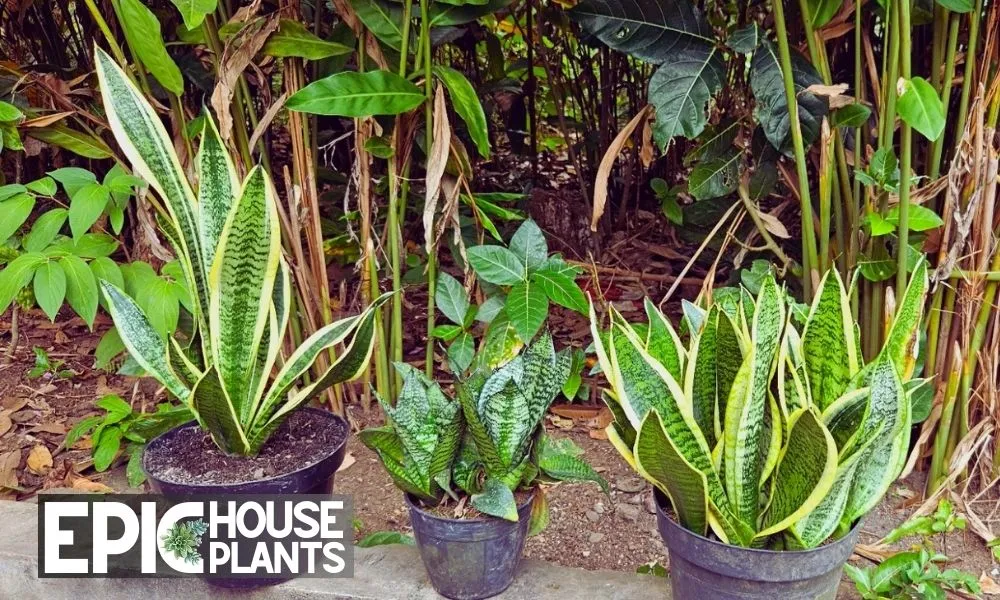
When it comes to low-maintenance and aesthetic appeal, the Snake Plant, also known as the “Mother-In-Law’s Tongue,” is an unbeatable choice.
But, do you know how to multiply this charismatic beauty? If not, worry not. This article is designed to guide you step by step on how to divide a snake plant, ensuring you expand your green family with ease.
Pros & Cons of Separating Snake Plants
While separating snake plants is an easy and accessible process, it’s worth considering the pros and cons that come with this propagation method.
Pros of Separating Snake Plants
- Faster than Leaf Cutting Propagation: While leaf cutting is another popular method to propagate snake plants, division tends to be quicker. It allows the plant to establish itself in the new pot more rapidly since it already has a root system.
- Maintains Variegation: If you have a variegated snake plant, division will allow you to maintain its beautiful coloring. When propagated through leaf cuttings, variegated snake plants often lose their unique patterns, but division helps to retain them.
- Higher Success Rate: Thanks to the roots already being established, the success rate of plant division is usually higher compared to other propagation methods.
Cons of Separating Snake Plants
- Requires a Large Snake Plant: In order to divide a snake plant, it must be mature and large enough to allow for multiple divisions. Younger, smaller plants may not survive the process.
- Produces Fewer New Plants: Compared to leaf cuttings, division might result in fewer new plants. However, what you lose in quantity, you gain in the speed and success rate of the propagation.
Author Note:
Weighing these pros and cons can help you decide whether division is the right propagation method for your snake plant. Remember, every plant is unique, and what works best will often depend on the specific plant’s size, age, and overall health. Happy planting!
Also Read: Repotting Snake Plant Like a Pro: A Comprehensive Guide
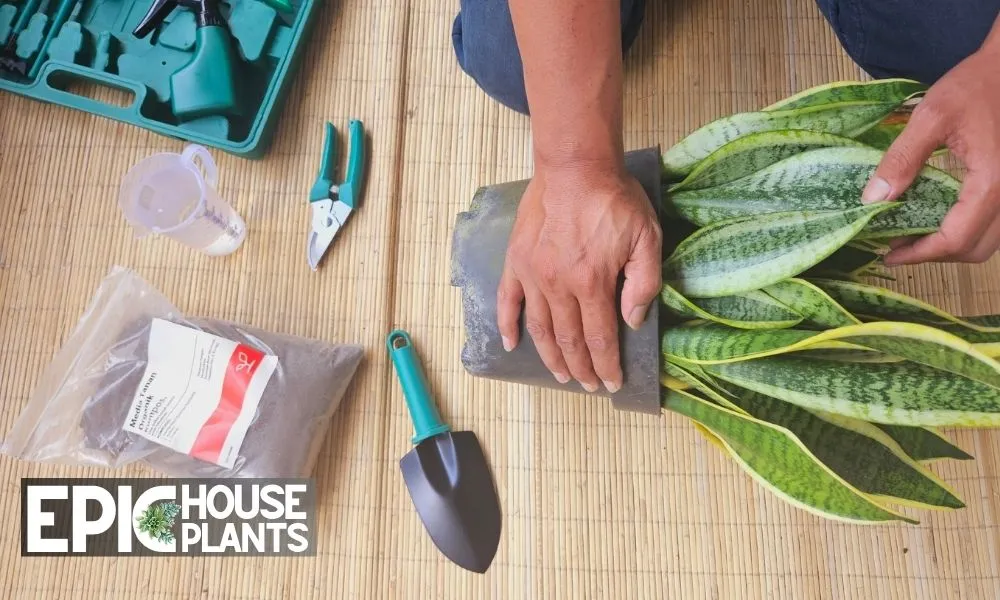
Tools and Materials
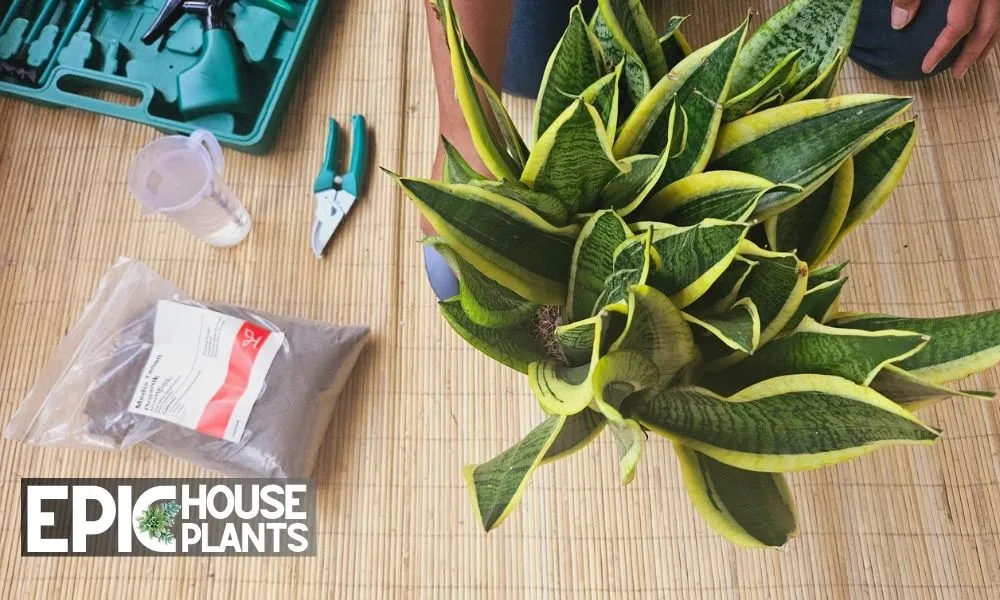
First and foremost, it’s essential to gather all the necessary tools and materials. Here’s your checklist:
The Snake Plant to Divide:
Make sure you select a healthy, mature snake plant. It should ideally have several leaves and strong roots to ensure successful division.
Prune Shears/Sharp Knife:
Whether you opt for shears or a knife, the key is to ensure that they’re sharp. A clean, precise cut reduces stress on the plant and enhances the success of the division process.
Author Note:
No rusty tools should be in sight. Make sure your cutting tools are clean and sterilized to prevent infection and disease from spreading to your newly divided snake plant.
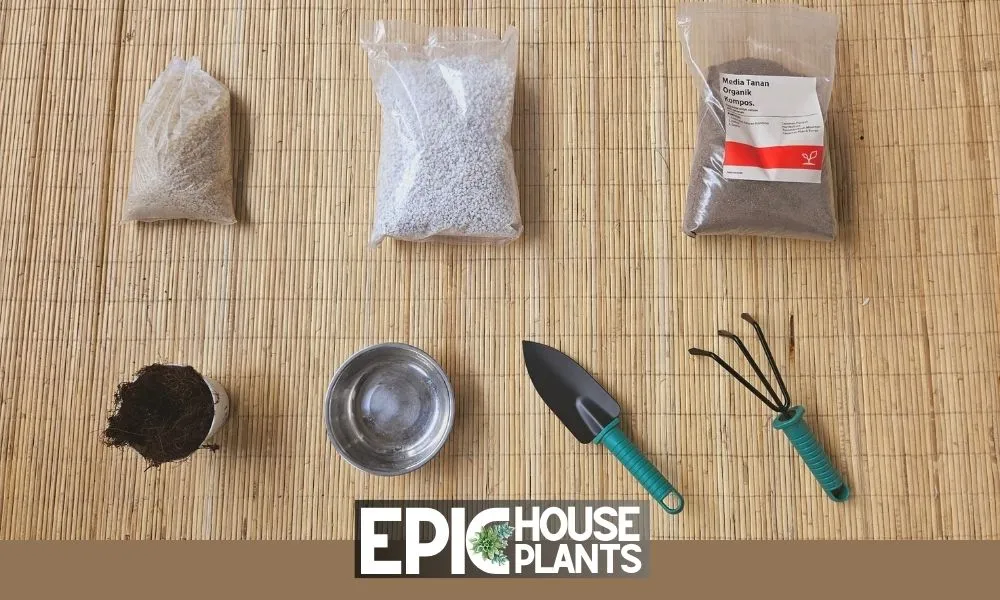
Nursery Pots:
You’ll need at least two pots, each equipped with well-draining holes. These will house your new snake plant divisions. Make sure they’re not too large; the pot size should match the size of the divided plant.
And remember, cleanliness is crucial. Scrub and rinse your pots before using them to keep your plant happy and healthy.
Cactus Potting Soil:
Snake plants love well-draining soil, so a cactus mix works great. It provides good porosity, essential nutrients, and promotes adequate air flow, all key elements for a thriving snake plant.
💡Once you’ve got all your tools and materials ready, you’re set to start dividing your snake plant. This process can seem daunting at first, but with the right knowledge and a little patience, you’ll soon have several thriving snake plants to enjoy or share with others. Happy planting!
How to Separate a Snake Plant Step by Step
Step 1: Let Your Snake Plant Dry Out:
Preparation is key. About a week before you plan to divide the snake plant, hold off on watering. This will make it easier to remove the plant from its pot when the time comes.
Step 2: Gather Tools and Materials:
Having everything within arm’s reach simplifies the process. Make sure you have your sterilized shears, clean pots, and cactus potting soil on hand.
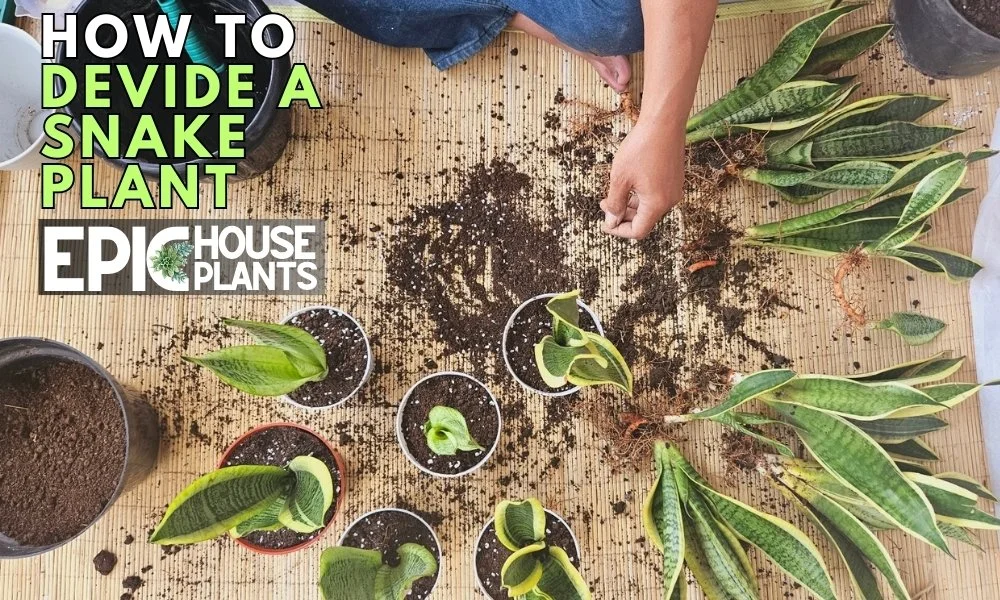
Step 3: Remove Your Snake Plant from Its Pot:
Carefully loosen the plant by tapping the sides of the pot. If it’s stubborn, don’t yank! Turn the pot upside down and gently coax the plant out.
Step 4: Loosen the Rootball and Remove Excess Soil:
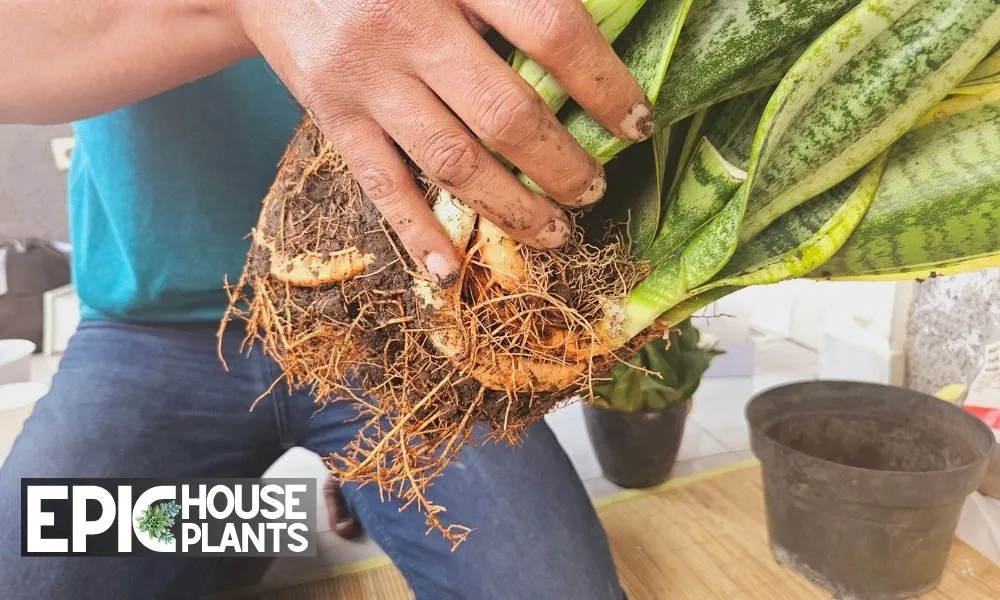
Delicately remove the soil from the roots, ensuring you do not damage them. This process exposes the rhizomes, which are critical for successful division.
Step 5: Cut the Rhizomes to Separate the Plant:
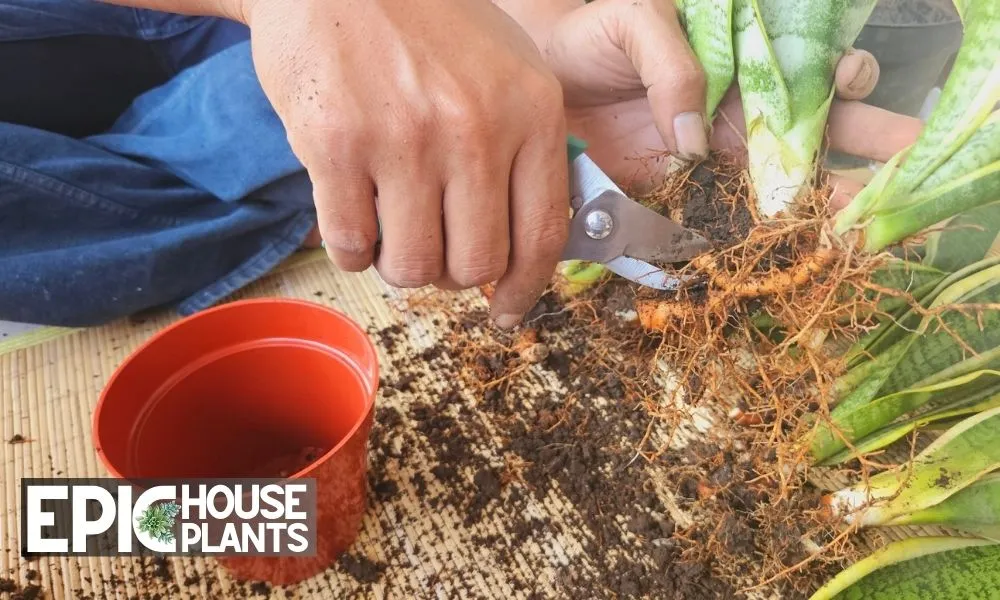
With your clean, sharp tool, cut the rhizomes in the middle. Each division should have its own roots, which will grow into new, independent plants.
Step 6: Replant the Divisions:
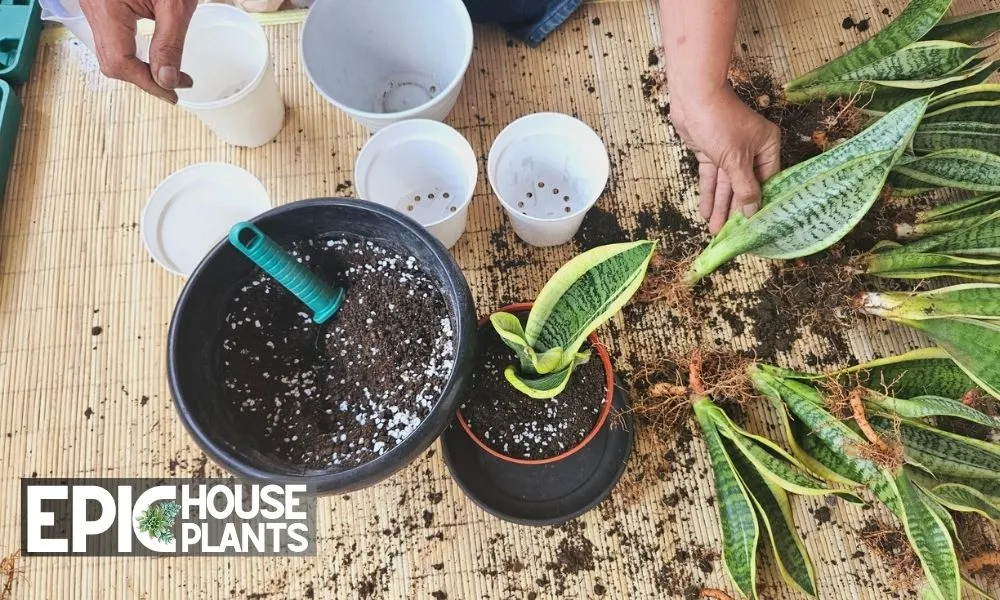
Take your new divisions and place them into their clean pots filled with cactus potting soil. You can plant more than one division in a pot if you want a fuller plant faster.
Step 7: Water Your Newly Planted Divisions:
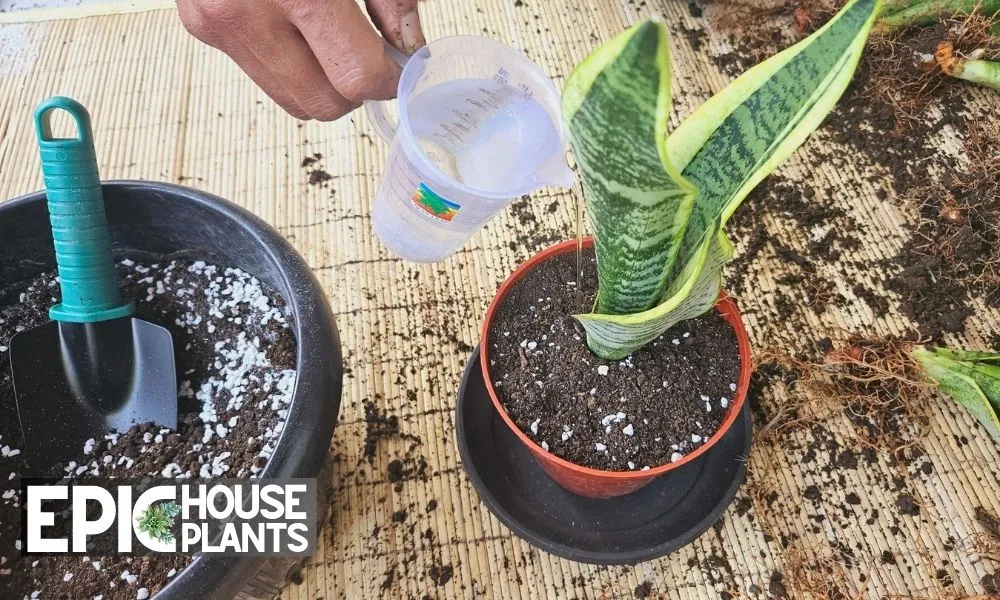
Once the divisions are secure in their new homes, water them thoroughly. This will encourage the development of new roots.
Step 8: Aftercare:
Place the newly potted divisions in a spot with bright, indirect light. Water only when the soil is fully dry to prevent overwatering, as snake plants prefer drier conditions.
Congratulations! You’ve just mastered the art of separating a snake plant. Follow these steps, and you’ll be filling your space with the beauty of these vertical greens in no time. Here’s to your horticultural success!
Separating Baby Snake Plant
A fascinating feature of these plants is their method of reproduction through ‘pups’ or baby snake plants. Let’s dive deeper into understanding these adorable baby plants and how they contribute to the life cycle of a snake plant.
The Journey of a Snake Plant Pup
The reproduction cycle of a snake plant is a natural marvel. Snake plants propagate naturally through a method called rhizome propagation. Rhizomes are thick stems that grow horizontally underground and, over time, produce new shoots.
These shoots break through the surface of the soil and develop roots of their own, eventually growing into individual snake plant individuals. This rhizome propagation results in a cluster of plants, allowing the snake plant population to flourish and spread naturally.
When Do Snake Plants Have Pups?
Snake plants typically produce pups when they’re mature and in healthy conditions. It’s not uncommon to see these baby plants emerge around the mother plant during spring and summer.
These seasons are conducive for growth, offering ample light and warmth that snake plants thrive in.
What Should You Do with Pups?
When you spot a pup around your mature snake plant, you have three options: you can either leave the pup with its mother, allowing it to continue growing naturally, or you can separate it to propagate a new plant.
You might also decide to remove it if the mother plant appears too crowded. The choice depends largely on your preferences and the health of the mother plant.
The Best Time to Separate Baby Snake Plants
If you decide to separate and propagate the pups, timing is key. Make sure the pups are mature enough to survive on their own—this usually means they are at least 4 inches tall or have four leaves.
The best time for separation is during the spring, which aligns with their natural growth cycle and gives them the entire growing season to establish themselves before the winter months.
Separating Baby Snake Plants: A Simple, Step-By-Step Guide
Have you ever thought about separating these baby Snake Plants to expand your indoor jungle or share the love with friends? This article will guide you through a simple step-by-step process to do just that.
Step 1: Let Your Snake Plant Dry Out
Before diving into the plant surgery, there’s some prep work to do. No watering for about a week prior.
This makes it easier to remove the plant from its pot without causing root damage and without getting drenched in the process. You want the soil dry and crumbly, not wet and compact.
Step 2: Gather Your Tools and Materials
A successful plant operation requires the right tools. Grab a clean, sharp knife or garden shears, a pair of gloves (to protect your hands from the sharp edges of the snake plant leaves), and some fresh potting soil mix. Make sure you also have some new pots ready for your baby plants.
Step 3: Remove The Mother Snake Plant & Her Pups From Its Pot
Now, with dry soil and tools at the ready, it’s time to carefully lift the mother plant out of her pot. Take your time and be gentle to avoid damaging the plant and its roots.
Step 4: Loosen the Rootbound and Remove the Soil
Next, gently loosen the rootbound. These are the roots that have become entangled around the edge of the pot.
After you’ve done this, remove the excess soil around the plant. This will give you a clear view of the rhizome (the horizontal stem from which the leaves and roots grow), ensuring you don’t accidentally cut the roots.
Step 5: Cut the Rhizome to Separate Mother Plant and Pup
Identify where the pup connects to the mother plant on the rhizome. Then, using your clean, sharp tool, make a careful cut to separate them. The ideal pup for separation should have its own roots and be at least 4 inches long or have at least 4 leaves.
Step 6: Replant the Pups Individually
Once the pup is separated, it’s time to settle it into its new home. Fill the new pot with fresh potting soil, make a hole in the center, and place the pup in it. Cover the roots with more soil, pressing gently to secure the plant.
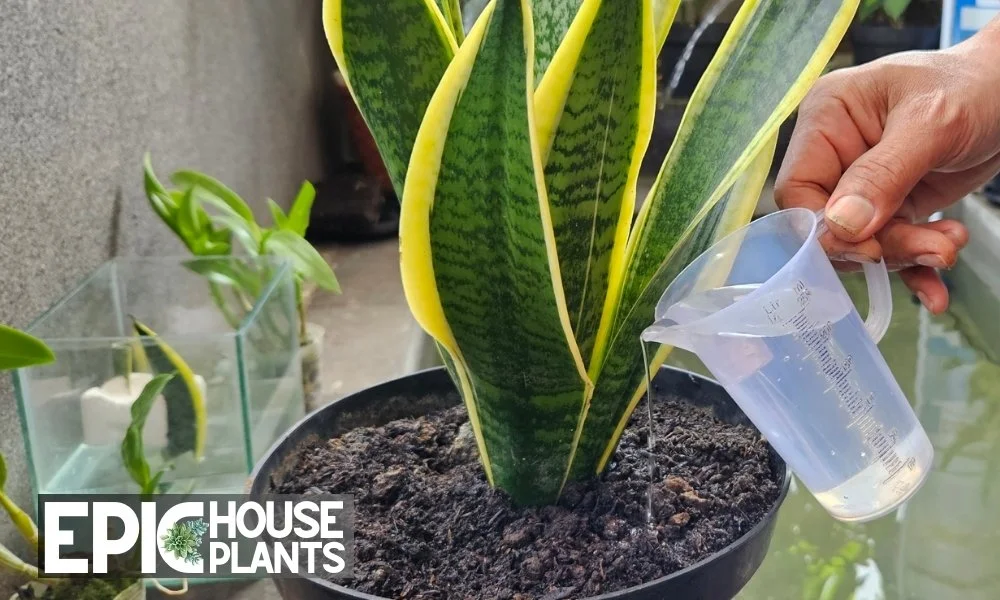
Step 7: Water to Encourage New Root Growth
After planting, water the soil thoroughly. This encourages the development of new roots, helping your baby snake plant to establish in its new environment.
Also Read: From Leaf to Life: Easy Guide to Propagate Snake Plant in Water
Baby Snake Plant Aftercare: A Guide to Nurture and Growth
Knowing how to care for your baby snake plants after the division is crucial. Let’s explore some simple yet effective aftercare tips to help your baby snake plants bounce back and thrive after propagation.
A Guide to Nurture and Growth
Although snake plants are resilient, the process of being dug up, trimmed, and replanted can take a toll. Until they recover and start growing again, your baby snake plants are in a sensitive stage. Here are some key steps to support them during this period:
1. Maintain Moist Soil: After replanting, keep the soil moist but not waterlogged. This helps encourage the formation of new roots without causing the pups to dry out. Be sure to avoid placing the plants in direct sunlight during this time as it can lead to dehydration. Once you see signs of new growth, which usually happens within 3-4 weeks, you can cut back on watering.
2. Hold Off on the Fertilizer: While you might be tempted to feed your baby plants to boost their growth, refrain from applying fertilizer immediately after planting. This can cause root and leaf burn.
Instead, give them some time to settle in their new environment. If you notice sluggish growth even after two months, consider using a gentle fertilizer to support their development.
3. Provide Adequate Light: Snake plants are champions when it comes to tolerating a wide range of light conditions. However, to stay healthy and vibrant, they do need some sun.
Avoid keeping your snake plants in areas with no access to natural light. An occasional dose of sun is beneficial, just make sure it’s indirect to prevent scorching their leaves.
4. Beware of Overwatering: It’s a common misconception that more water means more growth. However, too much water can harm or even kill a snake plant. After the initial moistening phase, ensure the soil is dry before watering again. This is particularly important for baby snake plants that are still building their root system.
Final Words
As we conclude our guide on “How to Separate a Snake Plant Step by Step”, we hope this enlightening journey has equipped you with the knowledge and confidence to propagate your snake plants successfully.
Remember, every new plant you propagate from your garden is a testament to your growing skills as a plant parent.
Interested in further refining your propagation skills? Check out our additional guide on Propagating Snake Plants in Soil. Here’s to greener thumbs and vibrant indoor jungles! Happy planting!
Author

Pudji Haryanto
Pudji Haryanto is a writer and urban farmer with a passion for cultivating plants. He has over 15 years of experience in agriculture and currently manages a 65,000 square foot rice-field and yard filled with various plants, including vegetables, spices, flowers, and garden plants.