Is your Snake Plant sagging or looking unhealthy? Discover our simple and detailed guide to bring your Sansevieria back to life. From spotting issues to rescue a drooping snake plant, we’ve got you covered.

Your Plant-Saving Toolkit
Alright, fellow plant savior! Ready to rescue that drooping snake plant? Before we dive into action-hero mode, let’s gather our superhero gear. Here’s what you’ll need:
- Pruning Tools: Still our trusty magic wands for snipping. Remember, sharper is better for those clean cuts.
- Disinfectant: Rubbing alcohol or a 10% bleach solution. Keeping our tools clean is Plant Care 101.
- Gloves: Our stylish and protective accessory. (Optional)
- Clean Cloth or Paper Towels: For any surprise spills and quick clean-ups.
- Neem Oil: This is like the secret potion for many plant ailments. It’s great for treating pests and giving your plant some extra love.
- Mild Soap (like Dr. Bronner’s Hemp Peppermint Pure Castile Oil): Think of this as a gentle spa treatment for your plant. It can help cleanse and refresh without being too harsh.
With these added items, you’re more than equipped for your mission. Now, let’s give that snake plant the VIP treatment it deserves!
How to Save a Drooping Snake Plant: A Step-by-Step Guide
If your Snake Plant, also known as Sansevieria, starts drooping, don’t panic! There could be a variety of reasons for this, and luckily, many of them are fixable. Here’s how you can bring your plant back to life:
Inspect the Leaves
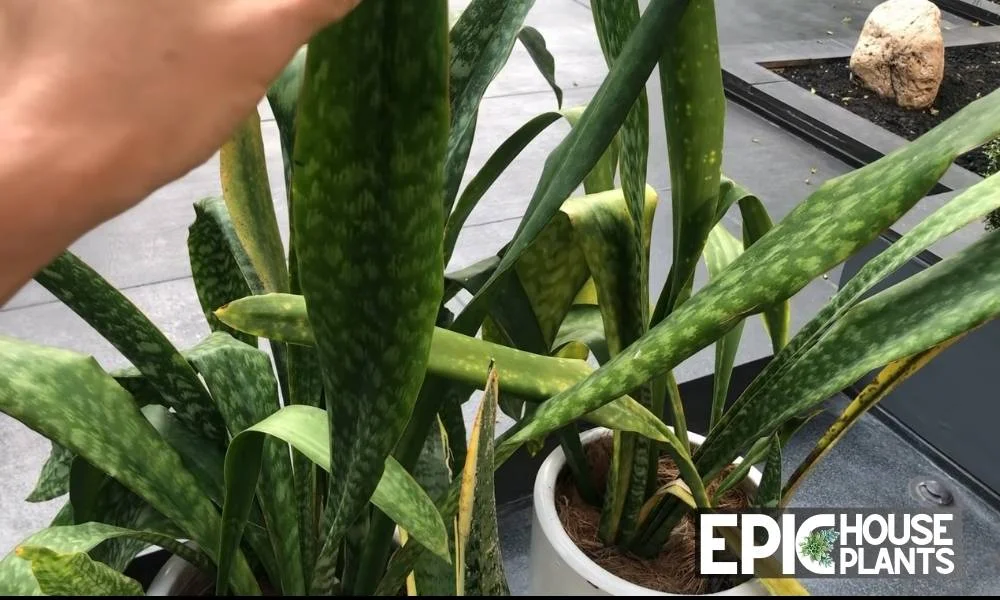
Begin by observing the leaves, as they often reveal potential problems:
Pest Indicators: Watch out for signs of spider mites, thrips, aphids, scale insects, and mealybugs. Their telltale signs include tiny white speckles, little salt-and-pepper flecks, brown bumps, white fluff, clusters of pear-shaped blobs, sticky patches with soot-colored mold, and wispy cobwebs.
Sunlight Deficiency: A lack of sun makes the leaves grow long and skinny, causing them to droop. The stripes on the leaves may also appear faded.
Soft Spots: Healthy Snake Plant leaves should be firm and springy. Mushy areas, especially at the base, could indicate root rot.
What to do next:
- For lighting issues, give your plant more sunlight. Refer to our guide on Snake Plants Lighting Requirements.
- Found mushy areas? Jump to “Check the Temperature” guide below.
- Didn’t see any danger signs? Jump to “Inspect the Roots” guide below.
- Got pests? Time for a special treatment. Continue reading.
Check the Pest Infestation

If your Snake Plant has been looking a bit down lately, the culprit might just be hiding on its leaves. This table will guide you through a leaf inspection, helping you identify potential pests that could be affecting your plant’s health.
| Symptom | Possible Culprit |
|---|---|
| Tiny white speckles making leaves look dusty | Spider mites or thrips (scarring) |
| Little salt-and-pepper flecks | Aphids and their exoskeletons or thrips’ scars and droppings |
| Small brown bumps | Scale insects |
| Bits of white fluff | Mealybugs |
| Clusters of pear-shaped blobs in various colors | Aphids (green, black, orange, red, or white) |
| Patches of sticky fluid with soot-colored mold | Honeydew from aphids, mealybugs, and scale |
| Wispy cobwebs | Spider mites (not actual spiders) |
Pests might be tiny, but they can cause significant harm. Armed with the information from our table, you’re now better equipped to spot the signs early and take the necessary steps below:
Step 1: Quarantine is Key First things first, move your plant away from the others. Just like we sometimes need to isolate when we’re sick, it’s the same with plants. This ensures that whatever is bugging your plant (pun intended!) doesn’t spread to the others.
Step 2: Shower Time! Take your plant for a little shower. By this, I mean use a strong stream of water (but not too strong, we don’t want to hurt it!) to rinse those leaves. This helps to wash away many of the pests on it. It’s like a spa treatment for your plant!
Step 3: Wipe Down with Rubbing Alcohol After that refreshing rinse, gently wipe the leaves with a cloth or sponge dipped in rubbing alcohol. This helps kill the stubborn critters that the water shower didn’t get.
Step 4: Time for a Soapy Spray or Neem Oil Now, mix some soapy water (a teaspoon of mild soap in a liter of water will do) or, for an even better effect, you can use neem oil. For the neem oil mix, add a teaspoon of it and a tiny bit of soap (to help it mix) to a liter of water. Once your mixture is ready, put it in a spray bottle and spritz your plant thoroughly. Make sure you get every nook and cranny!
Author Note:
A Little Note on Neem Oil: If you’re using neem oil, here’s a heads-up: it can make your plant more sensitive to sunlight. So, keep your plant in a spot with indirect sunlight while you’re treating it with neem oil.
Step 5: Repeat Weekly One-time spraying won’t do the trick. Pests can be persistent! So, make it a weekly ritual for a few weeks to ensure all those pesky pests are gone.
And there you have it! With just a few simple steps, you’ll have your plant back to its happy, healthy self in no time. Keep an eye on it, and with a bit of patience, you’ll beat those pests!
Check the Temperature

Soft spots on leaves might be due to temperature fluctuations. Watch out for locations near drafty windows, fireplaces, AC units, heating vents, and south-facing windows.
What to do next:
- If temperature seems to be the issue, relocate your plant to a place between 60-85°F. Then, move to Step 5.
- Otherwise, progress to “Inspect the Roots“
Inspect the Roots
Droopiness can stem from overly damp soil, which can cause root rot. Unearth your plant and look at the roots. Healthy roots are white or bright orange. Black, brown, or gray roots could be rotting.
What to do next:
- Noticed root rot? Jump to “Trim and Disinfect the Roots” guide below.
- No root issues? Skip to “Prune the Foliage“
Trim and Disinfect the Roots
Armed with disinfected pruning scissors, snip off every rotting root. Rinse the remaining roots in a mild hydrogen peroxide solution for added protection. Let’s jump in and save those roots!
Guide to Treating Rotting Roots:
Step 1: Prep Your Pruning Scissors Start by disinfecting your pruning scissors. You can either dip them in a 10% bleach solution or give them a good swipe with some rubbing alcohol. We want them super clean to avoid any more problems.
Step 2: Time for a Root Haircut Now, it’s trimming time. Look closely at the roots. If any root feels slimy or looks a bit off-color, it’s gotta go. Snip it off! And here’s a pro tip: always cut well above the rotten part, just to be extra sure you’re getting rid of all the bad stuff.
Step 3: Disinfect Between Cuts After every cut, swipe your scissors with your disinfectant again. Think of it like washing your hands – you don’t want to spread any germs (or, in this case, fungi) to the healthy parts of the plant.
Step 4: A Soothing Root Bath Once you’re confident you’ve clipped all the unhealthy bits away, give those roots a gentle bath. Mix up 1 part hydrogen peroxide with 2 parts water. This will act as a mild disinfectant. Gently dunk and swish the roots in this mixture. It’ll help get rid of any lingering bad guys.
And there you go! With these steps, your plant’s roots should be on their way back to health. Remember, plants are resilient, and with a little TLC, they can bounce back. Good luck, and happy planting!
What to do next: Progress to “Prune the Foliage“
Prune the Foliage
If rotten spots on the foliage are causing that droopy look, it’s time to bring it back to its snazzy, upright self. Let’s get to it!
Guide to Tending Rotten Foliage
Step 1: Spot the Problem Areas First things first, let’s check out those leaves. Mildly saggy leaves might perk up later, but spongy ones? Those have gotta go! Rotten spots won’t do your plant any favors, so we’re saying goodbye.
Step 2: Prep Those Pruning Tools Remember how we cleaned the scissors for the roots? Let’s do that again. Swipe them with some rubbing alcohol or a bleach solution. Safety first, right?
Step 3: Trim, Trim, Trim! Now, get to snipping! Cut off those rotting leaves, and always cut well below the icky parts. Sometimes, you might need to remove an entire leaf. And hey, if a leaf is only partly rotten, you might want to let it go. Once cut, they won’t grow back the same.
Step 4: Balance is Key Quick flashback: If you removed a bunch of the roots earlier (like more than ⅓ of them), you gotta balance things out. Your plant can’t support too much leafy weight with fewer roots. This might mean snipping off some perfectly good leaves, but always go for the damaged ones first.
Step 5: Pruning Tips for Snake Plants Here’s a little secret about Snake Plants: if you snip the tip of a leaf, it’ll never grow taller. So, if you’re just cutting a few leaves, take them all the way down to the soil. But if you’re trimming most of the plant, just cut the tops. We want to leave some green for good ol’ photosynthesis.
What to do next: Continue to “Repot Your Snake Plant“
Repot Your Snake Plant
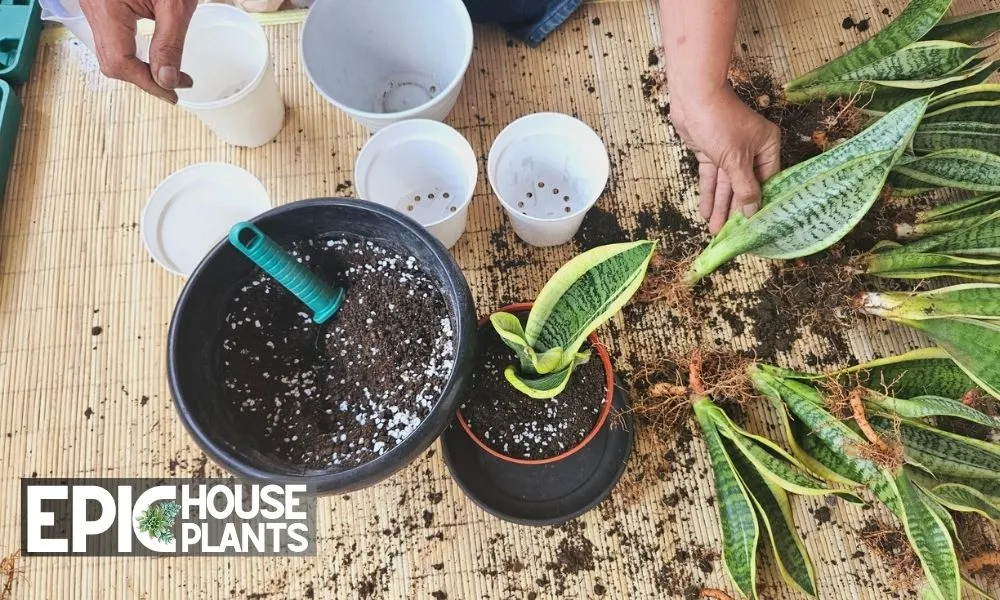
Toss the old soil, especially if root rot was evident. Use a well-draining cactus or succulent mix, or prepare one with perlite, coconut coir, and worm castings.
Choose a larger pot if the plant was root-bound and ensure it has drainage. Gently plant and water thoroughly. If you need more details, definitely check out our article about repotting snake plants.
Author Note:
After all the above steps, your Snake Plant needs tender loving care. Protect it from direct sunlight and ensure you water only when the soil is dry. Refrain from fertilizing for the next 4-6 weeks. With time and care, fresh leaves should emerge, signaling a return to health.
Other Snake Plant Problems
If your snake plant has been giving you a bit of attitude lately, or you’re just super keen on getting to know all its moods, I’ve got a reading list that you’ll absolutely love! Ready to dive deep into the world of snake plant drama? Let’s go!
Thirsty Plant Alert! Ever wondered if your snake plant is just plain thirsty? Check out Save Your Underwatered Snake Plant: Signs & Solutions.
Yellow Isn’t Always Mellow: Worried about those yellow leaves? Here are 13 Reasons Why Your Snake Plant Leaves Turning Yellow.
Drowning in Love: Sometimes, too much of a good thing (like water) can be bad. Learn How to Fix an Overwatered Snake Plant.
Is Your Plant Feeling Blue? If your plant’s vibe has been more “meh” than “yay,” then dive into Why Is My Snake Plant Dying? Understanding the Signs and Solutions.
The Mysterious Leaf Split: Ever stared at those split leaves and thought, “Why though?” Here’s The Curious Case of the Snake Plant Leaves Splitting: What’s Happening and Why.
Brown Tips Begone: No one likes a crispy tip. Get the lowdown on Snake Plant Brown Tips and How to Fix Them.
Happy reading! And remember, every plant has its moments. With a bit of love (and some great articles), your snake plant will be thriving in no time.
Author

Pudji Haryanto
Pudji Haryanto is a writer and urban farmer with a passion for cultivating plants. He has over 15 years of experience in agriculture and currently manages a 65,000 square foot rice-field and yard filled with various plants, including vegetables, spices, flowers, and garden plants.