Ready to dip your toes into the enchanting world of plant propagation? Let’s focus on a resilient and striking houseplant – the snake plant or Sansevieria.
Known for its architectural beauty and air-purifying qualities, snake plants are a favorite among plant enthusiasts. And guess what? You can grow a whole new snake plant from just a single leaf cutting!
In this article, we will explore the fascinating process of snake plant water propagation, breaking down the pros and cons to help you succeed.
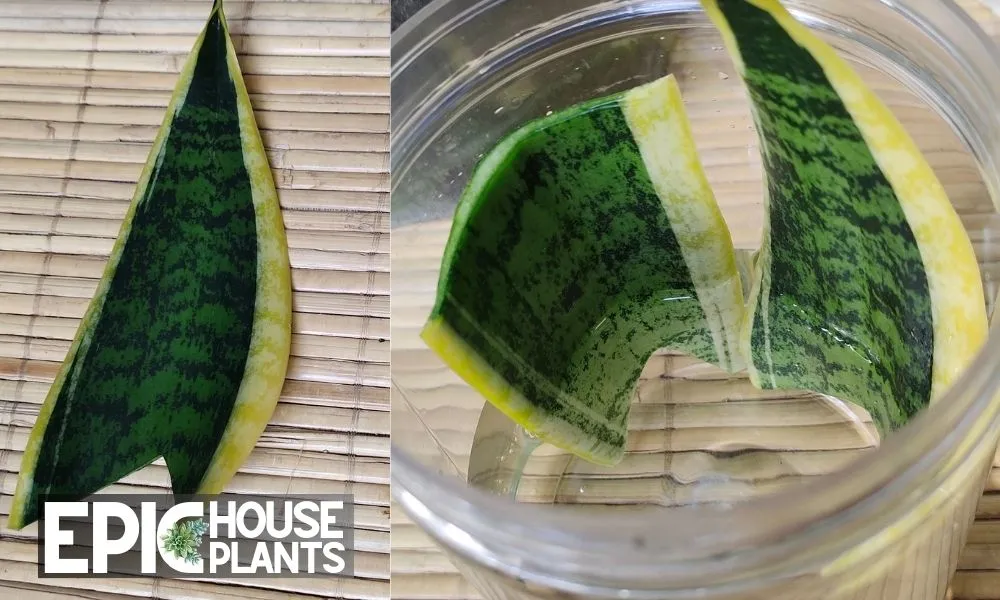
Pros and Cons of Snake Plant Water Propagation: A Special Note on Variegation
Whether you’re a seasoned plant parent or just starting your indoor gardening journey, propagating your snake plant can be a thrilling experience.
However, it’s important to be aware of the advantages and potential challenges that come with the water propagation method, especially if you’re dealing with a variegated snake plant.
The Pros of Snake Plant Water Propagation
1. It’s a Visual Experience:
There’s something magical about watching roots emerge and grow from a leaf cutting. Water propagation lets you witness this captivating process firsthand.
2. Budget-Friendly:
Water propagation is a cost-effective way to multiply your plant collection. All you need is a healthy leaf from your existing plant, a jar, clean water, and some patience.
3. Simple Care Routine:
The maintenance for water propagation is relatively straightforward. Just make sure the cuttings get enough light and remember to change the water weekly to keep it fresh and oxygen-rich.
💡Also Read: Discover the lifespan of snake plants and factors contributing to their longevity. Learn how to care for these durable houseplants, and explore tips to accelerate their growth.
The Cons of Snake Plant Water Propagation
While the water propagation method has its perks, it does come with a few challenges.
1. The Risk of Rot:
The major drawback to water propagation is the potential for rot. If your leaf cutting is submerged for too long or the water isn’t changed regularly, the cutting may rot, and your propagation attempt will be unsuccessful.
2. The Potential for Transplant Shock:
When it’s time to move your rooted cutting from water to soil, your snake plant might experience transplant shock. This could result in wilting or slowed growth, although with careful attention and care, your plant can usually bounce back.
3. Patience is a Virtue:
Water propagation is not a quick process. It can take several weeks, even months, for a cutting to develop roots. If you’re not a patient person, this could potentially be a drawback.
4. Variegation Consideration:
For variegated snake plants, there’s an additional challenge to consider. Variegated plants have a mix of green and white/yellow in their leaves due to a lack of chlorophyll in some cells.
When propagated through leaf cuttings, these plants often revert to a fully green form, losing their beautiful variegation.
Author Note:
This happens because the cutting does not inherit the parent plant’s genetic variegation, and the plant defaults to producing fully green leaves, which are better at photosynthesis.
Tools and Materials for Snake Plant Water Propagation
Growing your snake plant family doesn’t have to be a daunting task. With just a few simple tools and materials, you can propagate these striking houseplants with ease.
Let’s take a close look at what you’ll need and some helpful tips on using these tools for successful snake plant propagation.
Sharp Pruning Shears or Knife
Your journey to propagation begins with a clean cut. A pair of sharp pruning shears or a knife is your best friend here. Ensure the tool is clean and sharp to make a precise cut without causing unnecessary damage to the plant.
Remember, a clean cut near the base of the leaf is your goal. If using a knife, use a steady hand and make your cut with confidence.
Jar Filled with Water
After your cuttings are ready, the next stop is a jar filled with water. Any clean glass or jar will do, but try to choose one that can comfortably hold the leaf cuttings and allow them to stand upright.
Fill the jar with clean water, making sure only the cut ends of the leaves are submerged. This is your cutting’s temporary home, where it will start to develop roots.
Nursery Pot
As your cuttings begin to sprout roots, they will need a more permanent home. This is where the nursery pot comes in. Choose a pot that has good drainage to prevent waterlogging, which snake plants despise.
When it comes to size, opt for a pot that’s not too big. A pot that’s too spacious can lead to overwatering. Stick to a pot that’s just big enough to accommodate the cutting and its growing roots comfortably.
Cactus Potting Soil
Last but certainly not least, you’ll need some cactus potting soil. Snake plants love well-draining soil, and cactus mix is a great option. It’s specifically designed to not hold onto excess water, mimicking the natural, dry conditions snake plants prefer.
When planting your rooted cuttings, gently place them in the soil and ensure the roots are fully covered.
A Simple Guide to Propagating Your Snake Plant in Water
Step 1: Selecting the Leaf
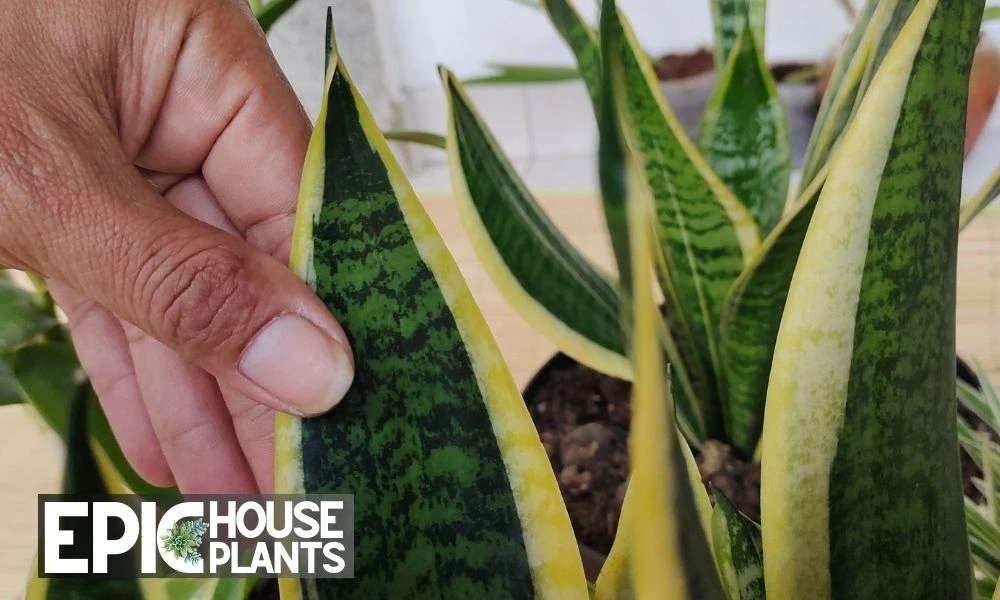
The first step towards successful propagation is choosing the right leaf. Aim for healthy and vibrant leaves. As a general rule, avoid overly mature or old leaves, as they might not root as well.
Step 2: Cutting the Leaf
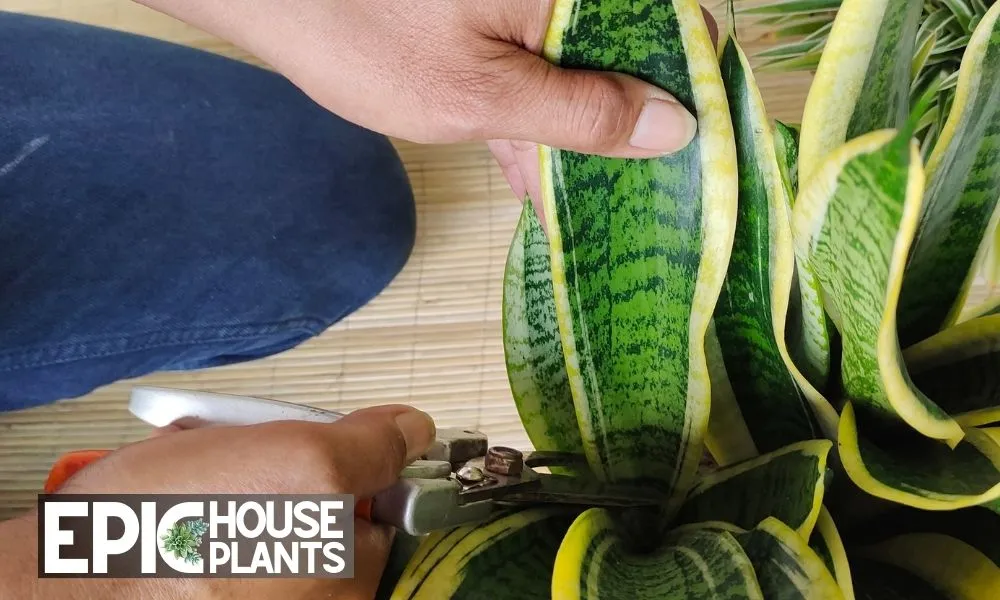
Once you’ve found the perfect leaf, it’s time to make a cut. Get your hands on a clean, sharp knife or shears and make your cut near the soil, close to the leaf’s base. This ensures you get as much of the plant’s potential rooting zone as possible.
Step 3: Preparing the Leaf Sections
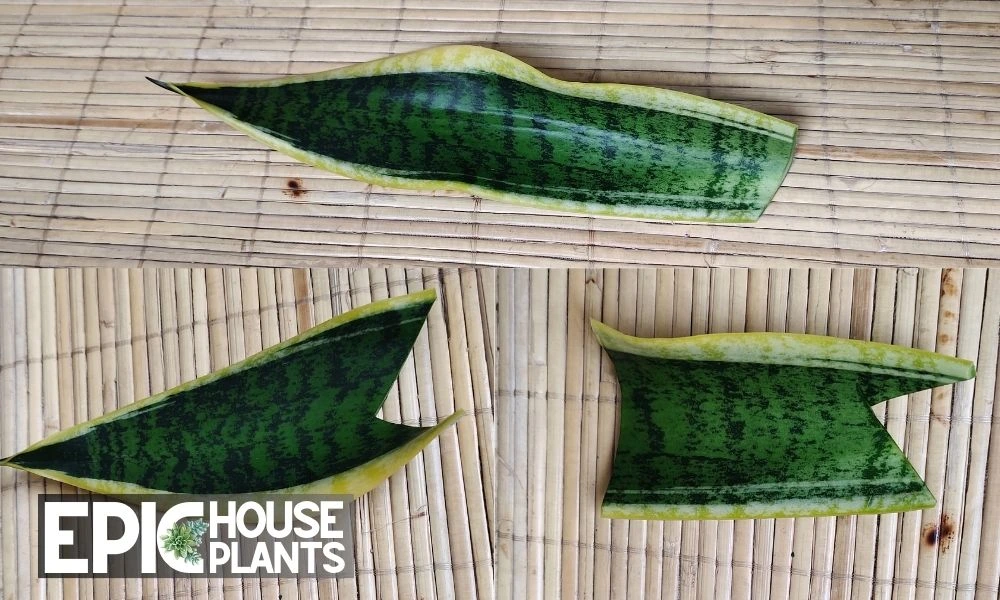
Now, carefully cut the leaf into several sections, each approximately 4 inches long. To increase your success rate, cut the bottom of each section into a V shape. This not only makes it easier to identify the bottom from the top but also gives more area for roots to develop.
Step 4: Let the Cuttings Callous
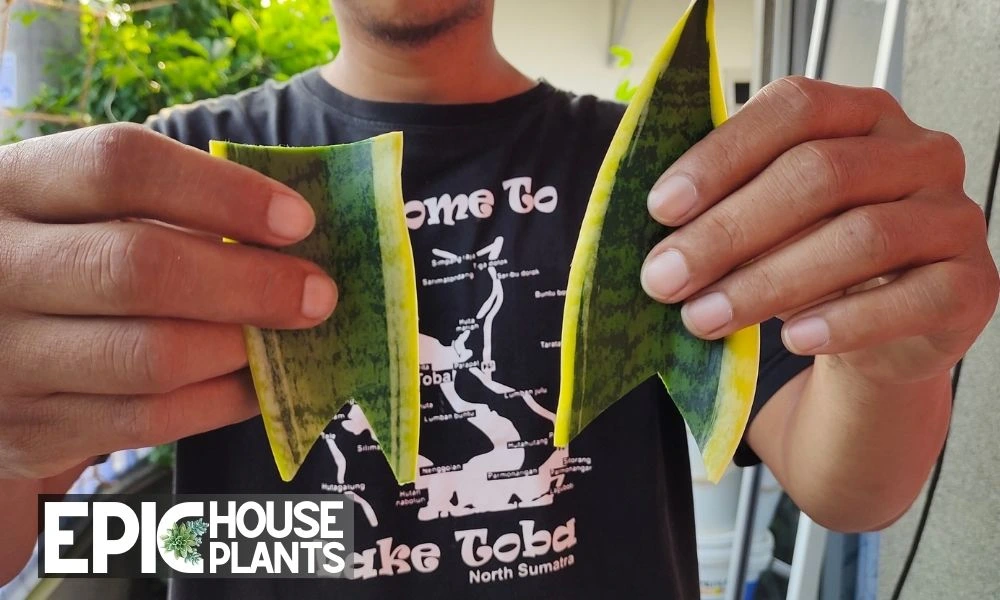
After cutting, let the leaf sections sit in room temperature for 1-2 days. This is a crucial step, as it allows the cuttings to form a callous, which helps prevent rot when placed in water.
Step 5: Hydrating the Cuttings
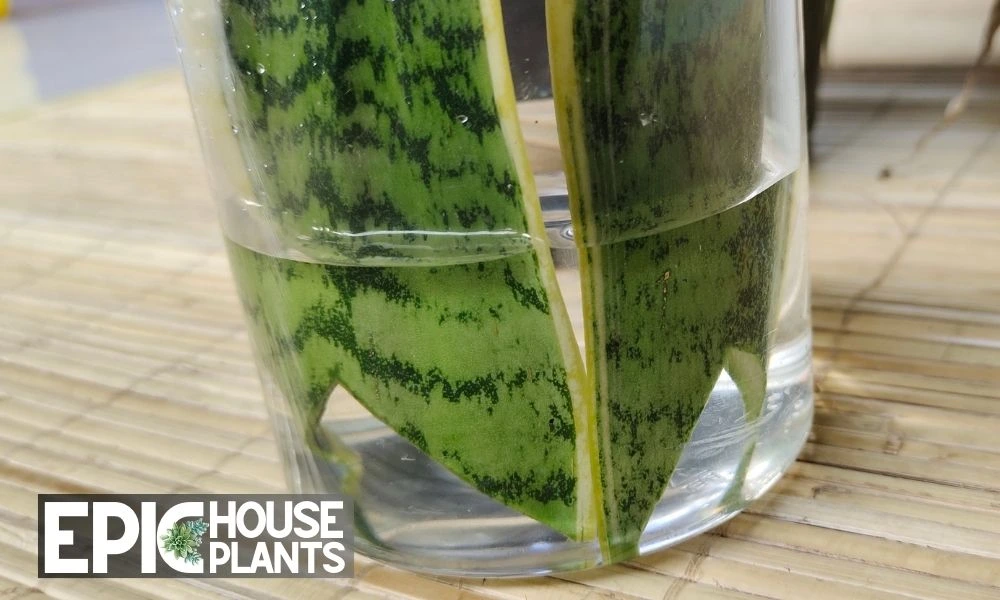
Next, it’s time for a water bath. Place the cuttings, V end down, into a jar filled with clean water. Make sure only the bottom part of the cuttings is submerged to avoid the risk of rot.
Also Read: Boosting Snake Plant Water Propagation: Exploring Styrofoam, Cork and Tape Methods
Step 6: Finding the Perfect Spot
Now that your cuttings are comfortably in their water bath, find a spot in your home with bright, indirect light. This kind of light exposure will give your cuttings the energy they need to start growing roots.
Step 7: Weekly Maintenance
Don’t forget to change the water in your jar every week to keep it fresh and free of bacteria. This weekly refresh will also supply the cuttings with necessary oxygen and hydration.
Step 8: Patience is Key
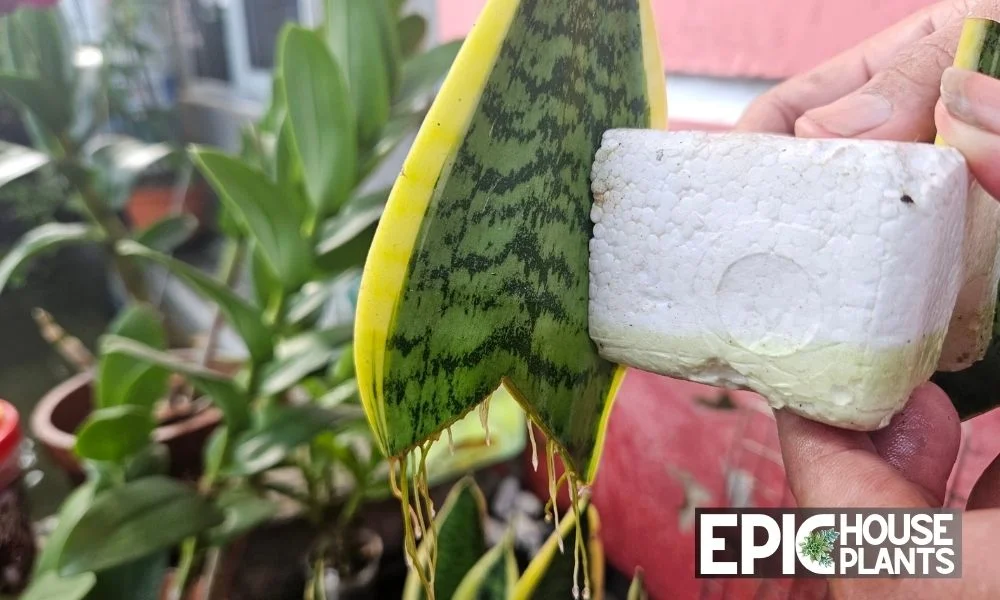
After a few weeks (typically 4-6 weeks), you’ll start seeing tiny roots emerging from the cuttings. It’s a joyous sight but hold off on the celebration just yet. It’s best to wait until the roots are about 3cm long before moving to the next step.
Author Note:
It takes approximately four weeks for the first tiny roots to appear, and over six weeks for the roots to fully develop, resembling the picture above
Step 9: Planting Time
Finally, once the roots have reached the appropriate length, it’s time to transition your cuttings into soil. Plant each rooted cutting into a pot filled with well-draining potting soil. Continue to care for your new snake plant just as you would the parent plant.
Tips to Level Up Your Snake Plant Propagation Game
Snake plant propagation is indeed an exciting journey, but a few extra tips can make the process even more rewarding. Here are some additional mind-blowing tips to ensure your propagation success.
1. Activating Root Growth: Cinnamon or Rooting Hormone
Did you know that common kitchen spices or a store-bought product could boost your propagation success? Dusting the cut end of your snake plant leaf with a bit of cinnamon or a rooting hormone before placing it in water can stimulate root growth. These substances act as natural antifungals, preventing the cuttings from rotting and encouraging faster, healthier root development.
2. Temperature Matters: Maintain Warm Conditions
Snake plants prefer warm conditions for root development. Ensure the room where you’re propagating your cuttings stays at a temperature above 70°F (21°C). This warm environment will accelerate root growth and shorten the propagation timeline.
3. Cleanliness is Key: Sterilize Your Tools
Before making any cuts on your snake plant, ensure your pruning shears or knife is clean and sterilized. You can wipe down the blades with rubbing alcohol. This prevents the spread of any diseases and gives your cuttings the best chance of success.
4. Underwater Light Show: Use a Transparent Jar
Using a transparent jar not only allows you to monitor root growth but also lets sunlight reach the developing roots. This can speed up the propagation process, as light exposure promotes root growth.
5. Oxygen Supply: Frequent Water Changes
While we’ve mentioned changing the water weekly, more frequent changes can be beneficial. Fresh water supplies oxygen to the cuttings, aiding their development. Consider changing the water every 3-4 days for optimal results.
FAQs
Q: How often should I repot my snake plant?
A: Snake plants are slow growers, so they usually only need repotting every 2-3 years. But keep an eye on the clues your plant gives you. If it seems to be outgrowing its pot or showing signs of distress, it may be time for a new home.
💡Also Read: Repotting a snake plant is an important part of keeping your houseplant healthy and happy. Knowing when to repot, what mix to use, and how to do it right can help ensure that your snake plant will thrive for years to come.
Final Words
Propagating your own snake plant can be an immensely satisfying journey. It’s like watching a little piece of life unfolding right before your eyes!
Despite some challenges, with patience and care, you’ll be well on your way to growing a thriving snake plant family of your own. Remember, every plant parent learns through experience.
So, don’t fret over the hiccups along the way. After all, the joy of gardening lies in nurturing, learning, and watching your green companions flourish. Happy propagating!
Author

Pudji Haryanto
Pudji Haryanto is a writer and urban farmer with a passion for cultivating plants. He has over 15 years of experience in agriculture and currently manages a 65,000 square foot rice-field and yard filled with various plants, including vegetables, spices, flowers, and garden plants.

